Henry just started walking a few weeks ago so he’s still pretty wobbly. At the beginning he also held his hands straight out in front of him. A lot of our friends and family suggested that Henry dress up as Frankenstein for Halloween to really embrace how stilted his stride is. While that really is a great idea, we were looking for something a little more on the cute side.
Our first idea was a garden gnome. It would have been super simple to find a pair of khaki pants, an over-sized shirt for a tunic, and a belt or pair of suspenders. Plus, hats with attached beards are fairly popular right now. We were so proud of ourselves for having thought of a costume idea a full month before Halloween, and a simple one at that.
Then I started thinking…(cue the music, we all know where this leads). Big Hero 6 is one of our favorite Disney movies, not only because Baymax is adorable, but also because it’s about maker culture. How cute (and perfect) would it be for Henry to be dressed up as Baymax and Adam to be dressed up at Hiro?
My first plan was to do something similar to Henry’s dinosaur costume from last year. I started shopping around for a white hoodie and sweatpants that I could sew details onto. Well my friends, good luck finding solid white clothes for a toddler! I understand why they don’t exist, but I needed them to exist. I went to every store in person and online that I could think of that might stock solid colored clothes. Finally I did find something that was perfect at American Apparel, but they didn’t have the hoodie in Henry’s size and the pants were completely sold out.
My next option was to buy a red hoodie and sweatpants to make a Baymax costume where he’s in his battle gear. This time I had no problem finding what I needed. I went to the fabric store to get some purple felt. I was all ready to go, but couldn’t bring myself to buy it. Would Henry still be dressed up as Baymax? Yes. But, would he still be as cute? No. Baymax’s cute factor is significantly reduced when he’s in his armor.
Here’s where the “crazy” part of my mom brain got activated. I had been telling myself all along that I wasn’t going to sew a full costume from scratch. I didn’t have the time. I didn’t have the patience. It would be too expensive.
I convinced myself that since I was already at the fabric store, I could spend a few minutes looking at the patterns to see if there was something that would be easy to alter into a Baymax costume. I found two patterns that had potential–the Simplicity 1032 and 2788. 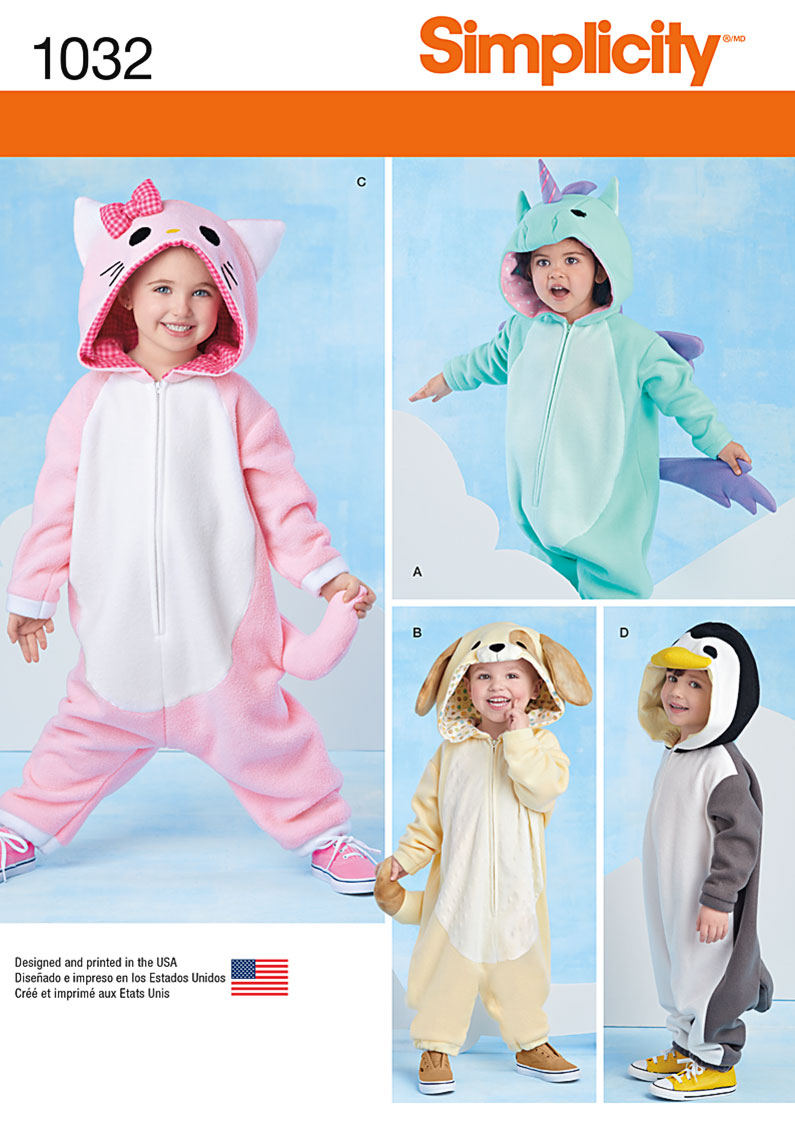
The 1032 would involve less sewing, but I was probably going to have to be creative and do a lot of mixing and matching of the different patterns. I could make the penguin jumpsuit all in white, but I’d have to do something about the tail. I could make the cat hood without the ears and bow, and put Baymax’s eyes on instead.

The 2788 would certainly involve more sewing, but the duck costume was really close to a Baymax costume. I could make the legs be white instead of yellow, omit the booties, and make the hat with no bill in all white. This is the pattern I chose to follow and alter in the end.
I went home to mull things over and share my crazy ideas with my husband. Maybe he would be able to convince me that I was taking this a little too far.
Adam ended up being all for making a costume from scratch, and even offered his help. It was now five days before Halloween so I hurried back to the fabric store to buy everything I needed. Luckily the pattern and all of the fabric I needed were on sale, plus I had a few coupons that I could use for the other notions.
Now anyone who has ever worked with a sewing pattern before knows that the worst part is trying to decipher the pattern instructions. It definitely seems like the company is charged by the word when they are writing the instructions. I often have to read and reread the instructions at least twice to make heads or tails of what they’re asking me to do. It really was smooth sailing the whole way through making this costume once I understood each step in the directions.
How to make a Baymax costume following Simplicity 2788
Below is a general outline that I followed to make this costume. You can reference the Simplicity directions here. I used this stuffed figure of Baymax as a guide.
- Purchase fabric and other notions according to the sizing on the back of the pattern package for the duck costume. I used ultra plush white fleece for the jumpsuit, body, hat and lining, white fleece for the padding, and white cotton interlock jersey for the arm bands. Also add in about 1/4 yard of ultra plush grey fleece for the patch details and a small piece of black felt for his eyes.
- Cut pattern pieces for duck costume according to the sizing. You will need all of the pieces except the ones for the bill of the hat (labeled as peak), and those for the feet.
- Cut grey patches. You will need one small circle for Baymax’s data slot on his chest (about 3 inches in diameter), two medium circles for his elbows (about 3 3/4 inches in diameter), two large circles for his sides (about 5 inches in diameter), and two large ovals for the legs (about 9 inches from top to bottom and 6 inches from side to side), paying attention to the nap.
- Cut Baymax’s eyes from the black felt. I made the circles be about 1 inch in diameter with about 3 inches between the eyes.
- Follow steps 1-7 of pattern for making the jumpsuit.
- Sew medium circles onto back of sleeves at elbow (approximately the center of the sleeve from top to bottom, but close to the seam that will run down the sleeve).
- Follow step 8-12 of pattern for making the jumpsuit.
- Sew large ovals to outer leg of jumpsuit. They should be centered at the seam, and be positioned at upper thigh level.
- Follow steps 13-15 of pattern to finish making the jumpsuit.

- Follow steps 1-2 and 5 of the pattern for the ladybug to make the puffy body of the costume.
- Sew small circle to upper right chest of the body. Add stitch detail to create the data slot.
- Sew large circle to sides just under arm holes and centered along the seam.
- Follows steps 6-11 of the pattern for the ladybug to finish the body of the costume.

- Follow step 1 of the pattern for the duck.
- Follow step 2 of the pattern for the duck, but sew the eyes before zig-zag stitching the face to the hat.
- Follow steps 3 and 5-7 of the pattern for the duck to finish the hat, ignoring references to the peak of the hat.
 Note: even though I measured Henry’s head and cut the pattern to match, the hat still ended up being too big for Henry. If I were to make it again, I would include an elastic band around the hat following a similar technique to the construction of the elastic band in the body.


Here are all of the pieces together:

Henry did not want to wear the hat, but I was able to convince him to keep it on when we were outside.

He was a little unsure of walking around while wearing the costume as well, so he instead he just froze in one place and tugged at his costume.

While this project ended up being a lot more intensive than I had originally planned, I’m really proud of how well it turned out. It’s a little big on Henry now which means he’ll have plenty of opportunities to wear it (and hopefully grow to like it).
